Bracelet and Earrings for the Summer
Acid Stripes €45
Acid Stripes
Fresh colours, bold stripes. I teamed these yellow turquoise and lime acrylic beads with small wood beads in similar colours. I put sets of three beads onto silver plated wire and joined each set with a silver ring. I fastened the bracelet with a silver plated toggle and attached a chain ending in three wood beads to add an element of fun.
Length 22.5 cms. 9 inches
I used three striped acrylic beads and threaded each one onto a silver plated wire. I top and tailed each one with a wood bead picking out the colours of the stripes. I joined the three dangles together with silver rings and finished the earrings with silver plated ear wires.
Length from hook 4cms 1.50 inches
Great summery colours, turquoise, lime and sunny yellow stripes.
Life in Ireland and Morocco....unique artisan jewellery, clothing and crafts....food and travel
Showing posts with label to buy on line. Show all posts
Wednesday, 25 May 2016
Tuesday, 17 May 2016
In my Etsy Shop....another Jewellery set for your wedding
Silver Spray Necklace and Earrings Set
...another beautiful set for your wedding available in my Etsy Shop today
In my Etsy Shop https://www.etsy.com/ie/listing/151433400/white-and-pewter-crystal-glass-beaded?ref=shop_home_active_13
€ 60 plus Shipping
Silver Spray
Pewter crystal faceted beads, crystal and opal fire polished glass beads, threaded on supple silver Beadalon wire, hang in a collar shape from white satin cord.
I love these bold pewter crystal glass beads and used them as the main feature. I added milky white and opal glass beads and silvery balls. I threaded them all onto satin silver Beadalon wire so that they took on a subtle shape and sparkled as they moved. I threaded the seven dangles onto white satin cord and closed the necklace with a pretty silver plated rose clasp enhanced with a central rhinestone.
The necklace measures
From end to end... 43 cms. (17 inches) ,
The centre dangles 10.5cms. (4.25 inches) in depth.
Gorgeous sparkly drop earrings made from white and pewter faceted crystal glass beads. I love these bold pewter crystal glass beads and used them as the main feature. I added a milky white, a crystal and a silvery glass bead and threaded them all onto silver plated wire; I completed the earring with a silver plated ear wire.
Length: from hook 4 cms. (1.5 inches)
The necklace measures
From end to end... 43 cms. (17 inches) ,
The centre dangles 10.5cms. (4.25 inches) in depth.
Gorgeous sparkly drop earrings made from white and pewter faceted crystal glass beads. I love these bold pewter crystal glass beads and used them as the main feature. I added a milky white, a crystal and a silvery glass bead and threaded them all onto silver plated wire; I completed the earring with a silver plated ear wire.
Length: from hook 4 cms. (1.5 inches)
Friday, 14 June 2013
How to - Etsy Style
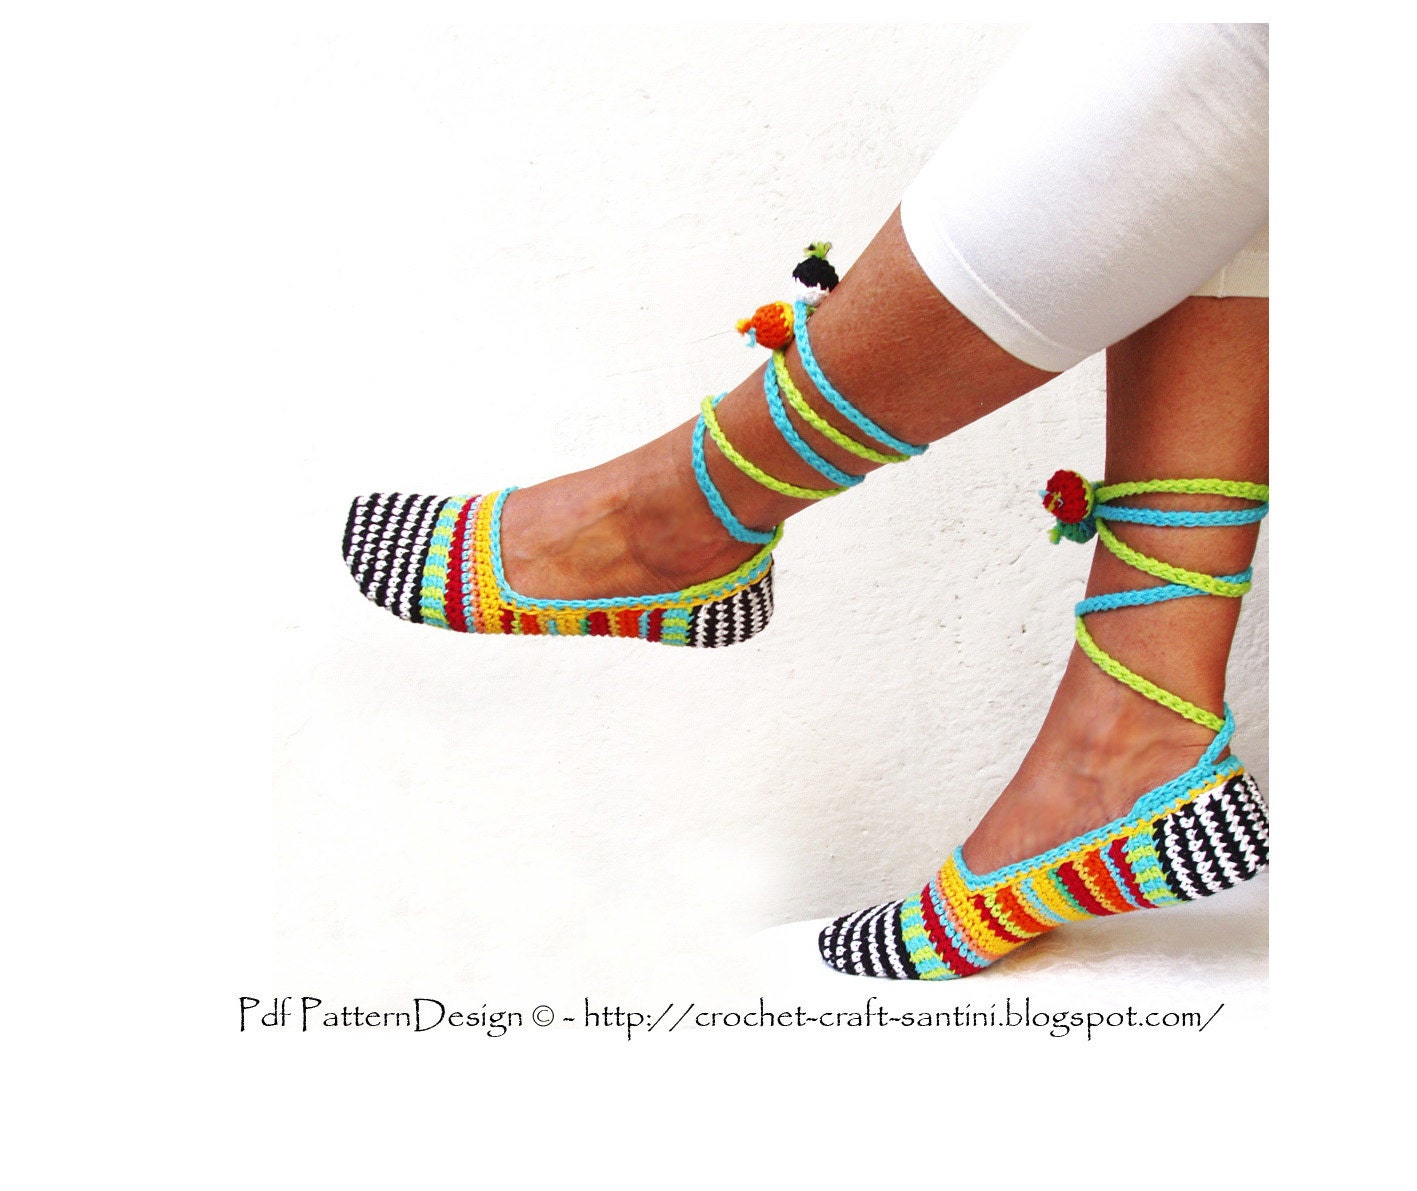
Happy Scrap Crochet - Slippers
I have just bought this Pdf.Pattern Design from Sophie and Me's Etsy Shop.
They are such fun I had to share them with you!
PDF INSTANT DOWNLOAD!
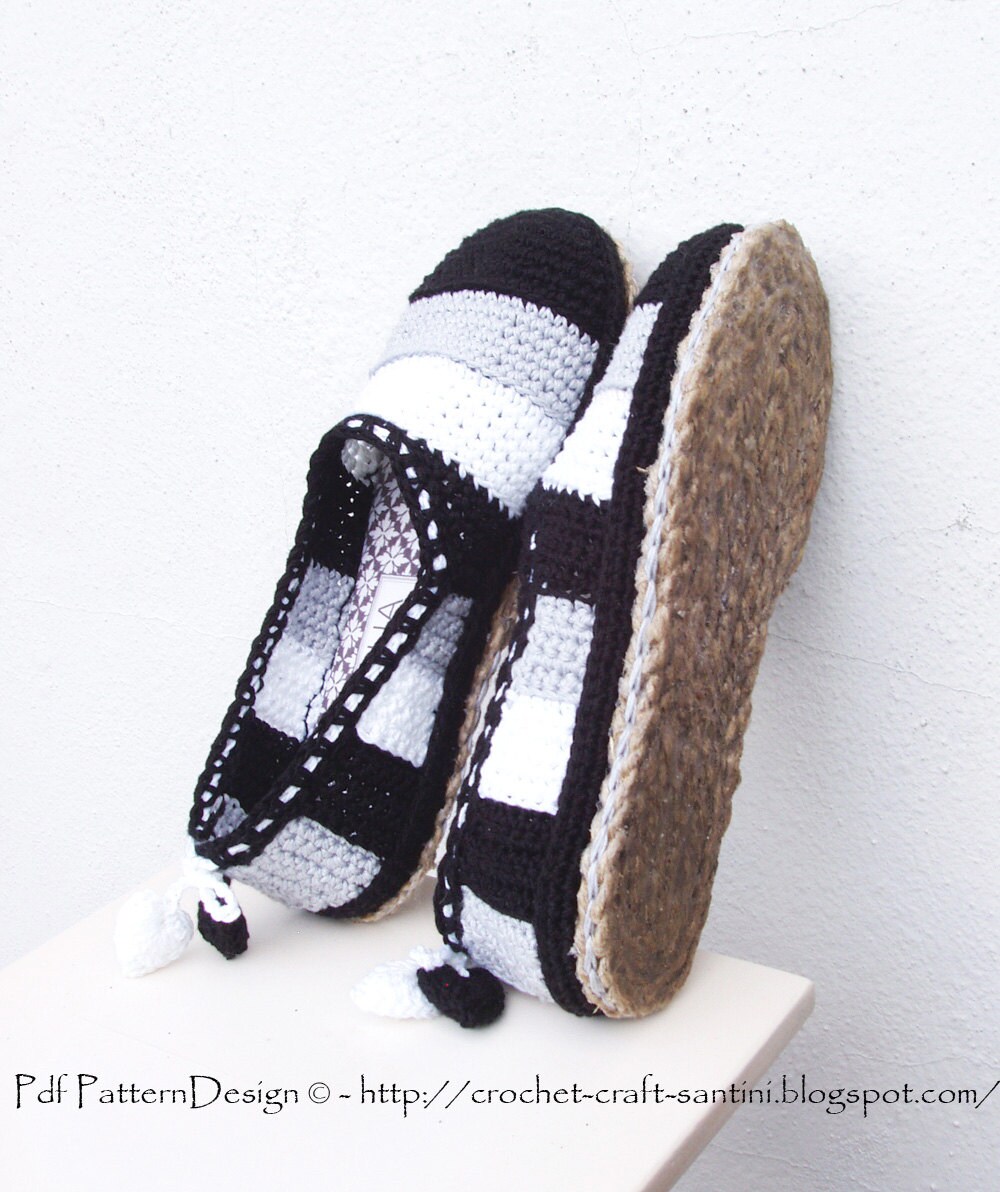
Happy Scrap-Shoes - Espadrilles - The Basic Slipper-Pattern.
This listing is for the crochet pattern basic slippers, no in- or outer soles. See info below for the soles applied.
Add color to your feet, treat you self with these happy summer slippers!
I bet the most of you yarn-people out there, have a lot of annoying leftovers, yarn from various projects, tiny yarn-balls stashed away, just in case!
I have.
These one-piece, toe-up slippers are a perfect project to get rid of some of the smallest balls.
It was great fun! The final result is amazing, they give me a real happy summer-feeling! Looks great on tanned legs!
I can see the shoes in endless color-combinations; find your stash-box, and choose your favorite colors!
Very comprehensive and easy to understand instructions.
I also bought the instructions for making the rope soles so that my slippers become shoes!
So looking forward to making them!
INSTANT DOWNLOAD PDF
ALLOW ME TO INTRODUCE: THE ONE AND ONLY…
ROPE-SOLE!
Tailored Sole-Method, Suitable for any foot-size and applies to ANY crochet/knit slipper.
NO sole-hole-punching!
DON’T WORRY ABOUT THE MATERIALS, YOU’LL FIND THEM IN YOUR KITCHEN DRAWER, OR YOU CAN PURCHASE THEM IN ANY HW-STORE, OR YOU CROCHET THE CORDS YOURSELF!
VERY detailed step-by-step instructions with pics!
This sole is my first and original idea, in order to turn crochet slippers into street shoes! I've been obsessed by this project for months, and I’m so happy with the simpleness of the final result, which I’m now shearing with you!
After the success with The Crochet Sole, I feel confident that you can handle this challenge too! The crochet-sole is super, but this one is the best! It’s strong, durable, comfortable and has a cool look! And is sooo easy and fast to make!
You can apply your one-piece slippers to the sole, or you can continue to crochet a shoe on the sole. And to make them even more sturdy and durable, put in handmade inner-soles!
Let’s do it together, just follow the simple steps in the TUTORIAL!
And last, but not least; The out-door treatment which will transfer your slippers into street shoes!
The treatment protects the soles against dirt, dust, wear and tear. And is just wonderful to walk on! So soft and flexible! NOTE: With a good rope-sole, you don’t even need the treatment!
THIS pattern includes:
11 pages PDF with written instructions, and lots of step-by-step images!
Tutorial for the rope tray-soles
Tutorial for the inner soles
Tutorial for how to assemble slippers to soles
Tutorial for the outer-sole treatment
Visit Sophie and Me to see all the other lovely items in their Etsy Shop
I have just bought this Pdf.Pattern Design from Sophie and Me's Etsy Shop.
They are such fun I had to share them with you!
Happy Scrap-Shoes - Espadrilles - The Basic Slipper-Pattern.
This listing is for the crochet pattern basic slippers, no in- or outer soles. See info below for the soles applied.
Add color to your feet, treat you self with these happy summer slippers!
I bet the most of you yarn-people out there, have a lot of annoying leftovers, yarn from various projects, tiny yarn-balls stashed away, just in case!
I have.
These one-piece, toe-up slippers are a perfect project to get rid of some of the smallest balls.
It was great fun! The final result is amazing, they give me a real happy summer-feeling! Looks great on tanned legs!
I can see the shoes in endless color-combinations; find your stash-box, and choose your favorite colors!
Very comprehensive and easy to understand instructions.
I also bought the instructions for making the rope soles so that my slippers become shoes!
So looking forward to making them!
ALLOW ME TO INTRODUCE: THE ONE AND ONLY…
ROPE-SOLE!
Tailored Sole-Method, Suitable for any foot-size and applies to ANY crochet/knit slipper.
NO sole-hole-punching!
DON’T WORRY ABOUT THE MATERIALS, YOU’LL FIND THEM IN YOUR KITCHEN DRAWER, OR YOU CAN PURCHASE THEM IN ANY HW-STORE, OR YOU CROCHET THE CORDS YOURSELF!
VERY detailed step-by-step instructions with pics!
This sole is my first and original idea, in order to turn crochet slippers into street shoes! I've been obsessed by this project for months, and I’m so happy with the simpleness of the final result, which I’m now shearing with you!
After the success with The Crochet Sole, I feel confident that you can handle this challenge too! The crochet-sole is super, but this one is the best! It’s strong, durable, comfortable and has a cool look! And is sooo easy and fast to make!
You can apply your one-piece slippers to the sole, or you can continue to crochet a shoe on the sole. And to make them even more sturdy and durable, put in handmade inner-soles!
Let’s do it together, just follow the simple steps in the TUTORIAL!
And last, but not least; The out-door treatment which will transfer your slippers into street shoes!
The treatment protects the soles against dirt, dust, wear and tear. And is just wonderful to walk on! So soft and flexible! NOTE: With a good rope-sole, you don’t even need the treatment!
THIS pattern includes:
11 pages PDF with written instructions, and lots of step-by-step images!
Tutorial for the rope tray-soles
Tutorial for the inner soles
Tutorial for how to assemble slippers to soles
Tutorial for the outer-sole treatment
Visit Sophie and Me to see all the other lovely items in their Etsy Shop
Subscribe to:
Posts (Atom)